Enhanced 911 (E911)
With old generation phone systems where access to the public phone networks was controlled by the local incumbents (AT&T, Verizon, etc…), your location was tied to the physical facilities used to provide your dial tone. In the world of Voice over Internet Protocol (VoIP), this is no longer the case.
Now your physical address used by first responders in the event of an emergency is tied to a phone number used by a phone or phone system as an outgoing caller ID number. This has some benefits. Chief among them is granularity when presenting location to emergency services. For instance. You can register a unique address (including suite/room numbers) to different phone numbers. One phone number may be registered to the main front desk at the nursing home and each individual resident might have a phone number registered to their specific room. Giving first responders more location information beyond just the street address of the building.
Having the correct E911 registration is critical. If you were to call 911 using a caller ID number that is not registered you may experience a delay as your call will need to be routed to the correct PSAP (Public Safety Answering Point) and are subject to fines that will be passed through by N2Net.
Please click the link below to learn about how you can manage your own E911 registrations by using our new tools in the customer portal.
How to Manage Your E911 Registrations
Step 1.
Begin by logging into your customer portal at https://customer.n2net.net/
Once logged in click the Voice tab at the top of the screen.

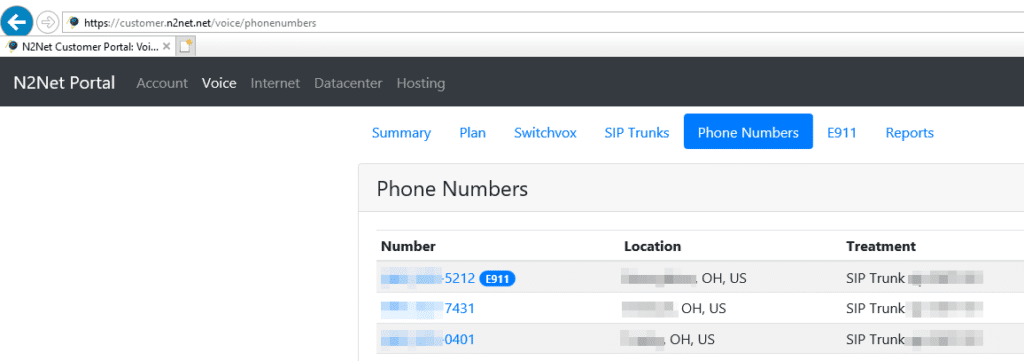
Step 2.
Click the Phone Numbers tab on the secondary navigation bar.

Step 3.
You will notice the E911 “tag” next to a phone number that already has an E911 registration. If you would like to edit this address just click the phone number. Otherwise to add a new E911 registration click the phone number you would like to associate with an address.
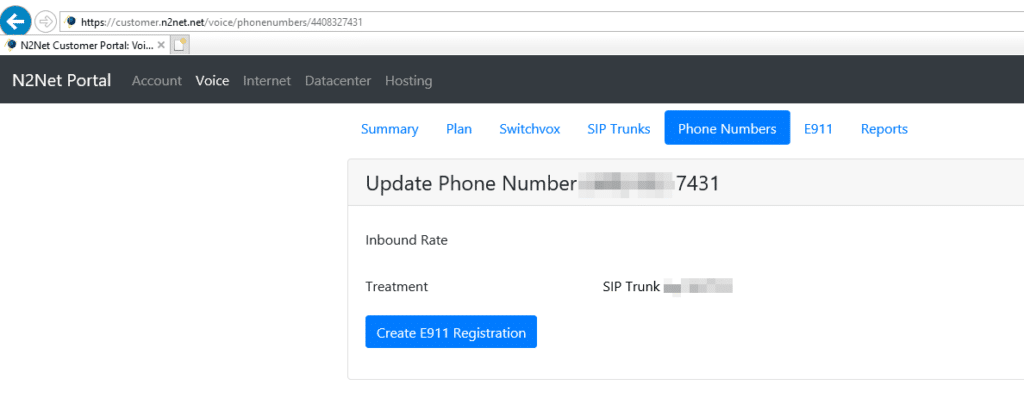
Step 4.
Click the Create E911 Registration button.
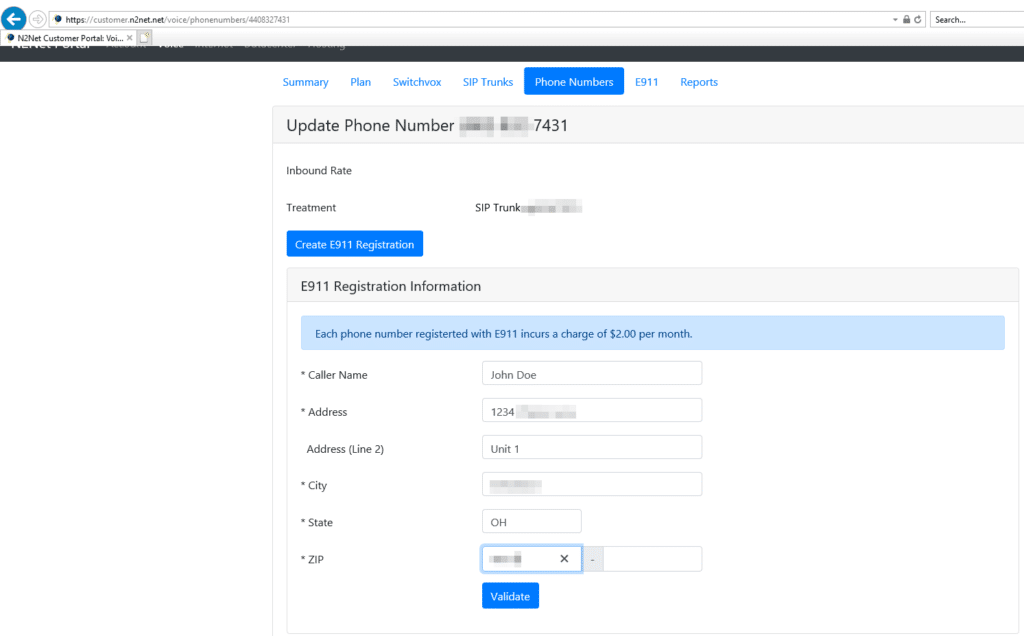
Step 5.
Here you can enter the company name and street address associated with this phone number. When done click the Validate button.
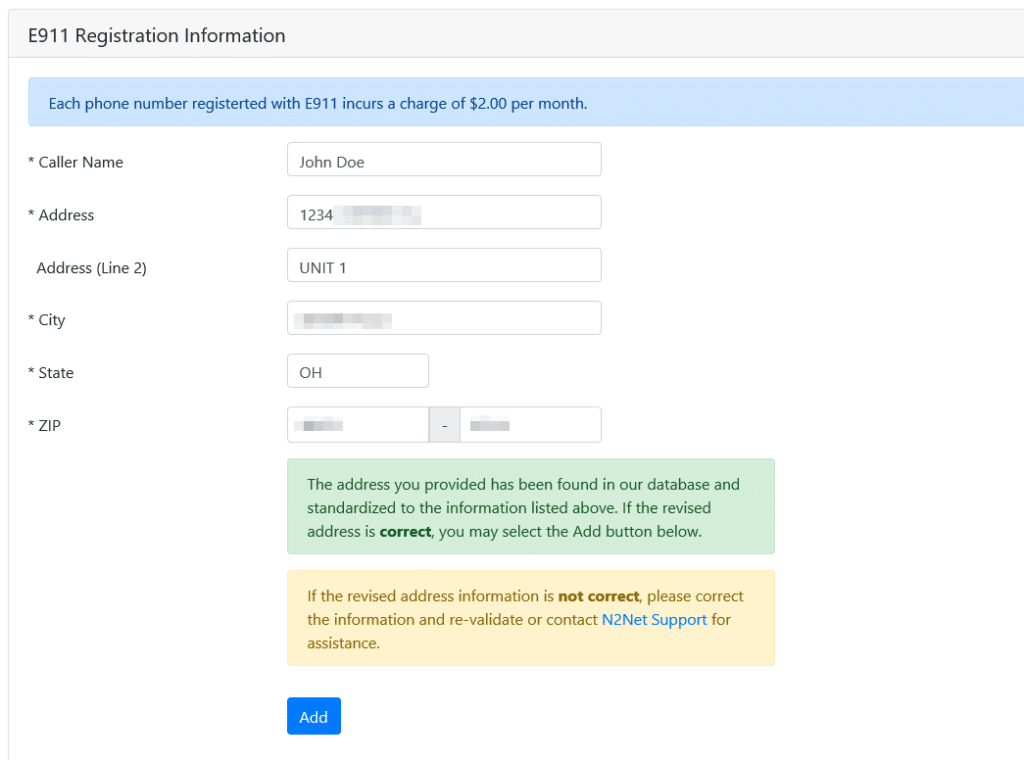
Step 6.
At this point, the system will attempt to validate the address entered. It will modify the address if need be. Please carefully review that the address is correct and click the Add button.
That’s it! As always if you have any questions or concerns please feel free to contact N2Net support either by calling 216-619-2000 and selecting option 2 OR by sending an email to support@n2net.net.
[qodef_list_ordered]
Quick Login Links
Knowledge Base
[/qodef_list_ordered][qodef_list_ordered]UniVoice Table of Contents
- Voice Portal
- Feature Codes
- Downloadable Guides
- Phone Setup Guides
- Local and Toll-Free Number Portability
- Enhanced 911 (E911)
- UniVoice SIP Trunking
- SIP Trunk Troubleshooting (SonicWALL)
[/qodef_list_ordered]